How to Tether Sony a7III to Lightroom
When I first attempted to tether my Sony a7iii with Lightroom, I darn near wanted to pull my hair out. I couldn't figure out why my camera wouldn't tether, but after lots of Googling, troubleshooting, and patience, I was finally able to get my camera connected.
Since I struggled trying to figure out how to connect my camera, I thought there could be other Sony photographers who could use some help to get connected too. I wrote this step-by-step guide with the anticipation that it would hopefully help other confused and frustrated Sony users who want to try shooting tethered. If you'd like me to talk you through this process, click here to watch a video where I share the same information on YouTube.
Disclaimer: This post contains affiliate links. If you click a link and make a purchase, I will earn a percentage of the purchase at no additional cost to you. Thanks for supporting me so I can continue to create more content like this!
If you haven't already tried shooting tethered, it’s a great tool to take advantage of and it’s useful for all kinds of photography.
Shooting tethered allows you to see your images in real time on a much larger screen than just on a small viewfinder or LCD. It allows you to remotely control your camera and see various grid overlays which are extremely helpful with framing, composition, and stop motions. It can even help you gain bonus points from clients because clients love to be able to easily see what's happening as you're working.
Unfortunately as of now, the Sony a7iii cannot directly connect to tether with Lightroom Classic. The good news is that Sony developed its own free software which serves as a bridge to allow your Sony a7iii to connect and work with Lightroom.
What you will need to tether Sony a7iii to Lightroom (Classic) :
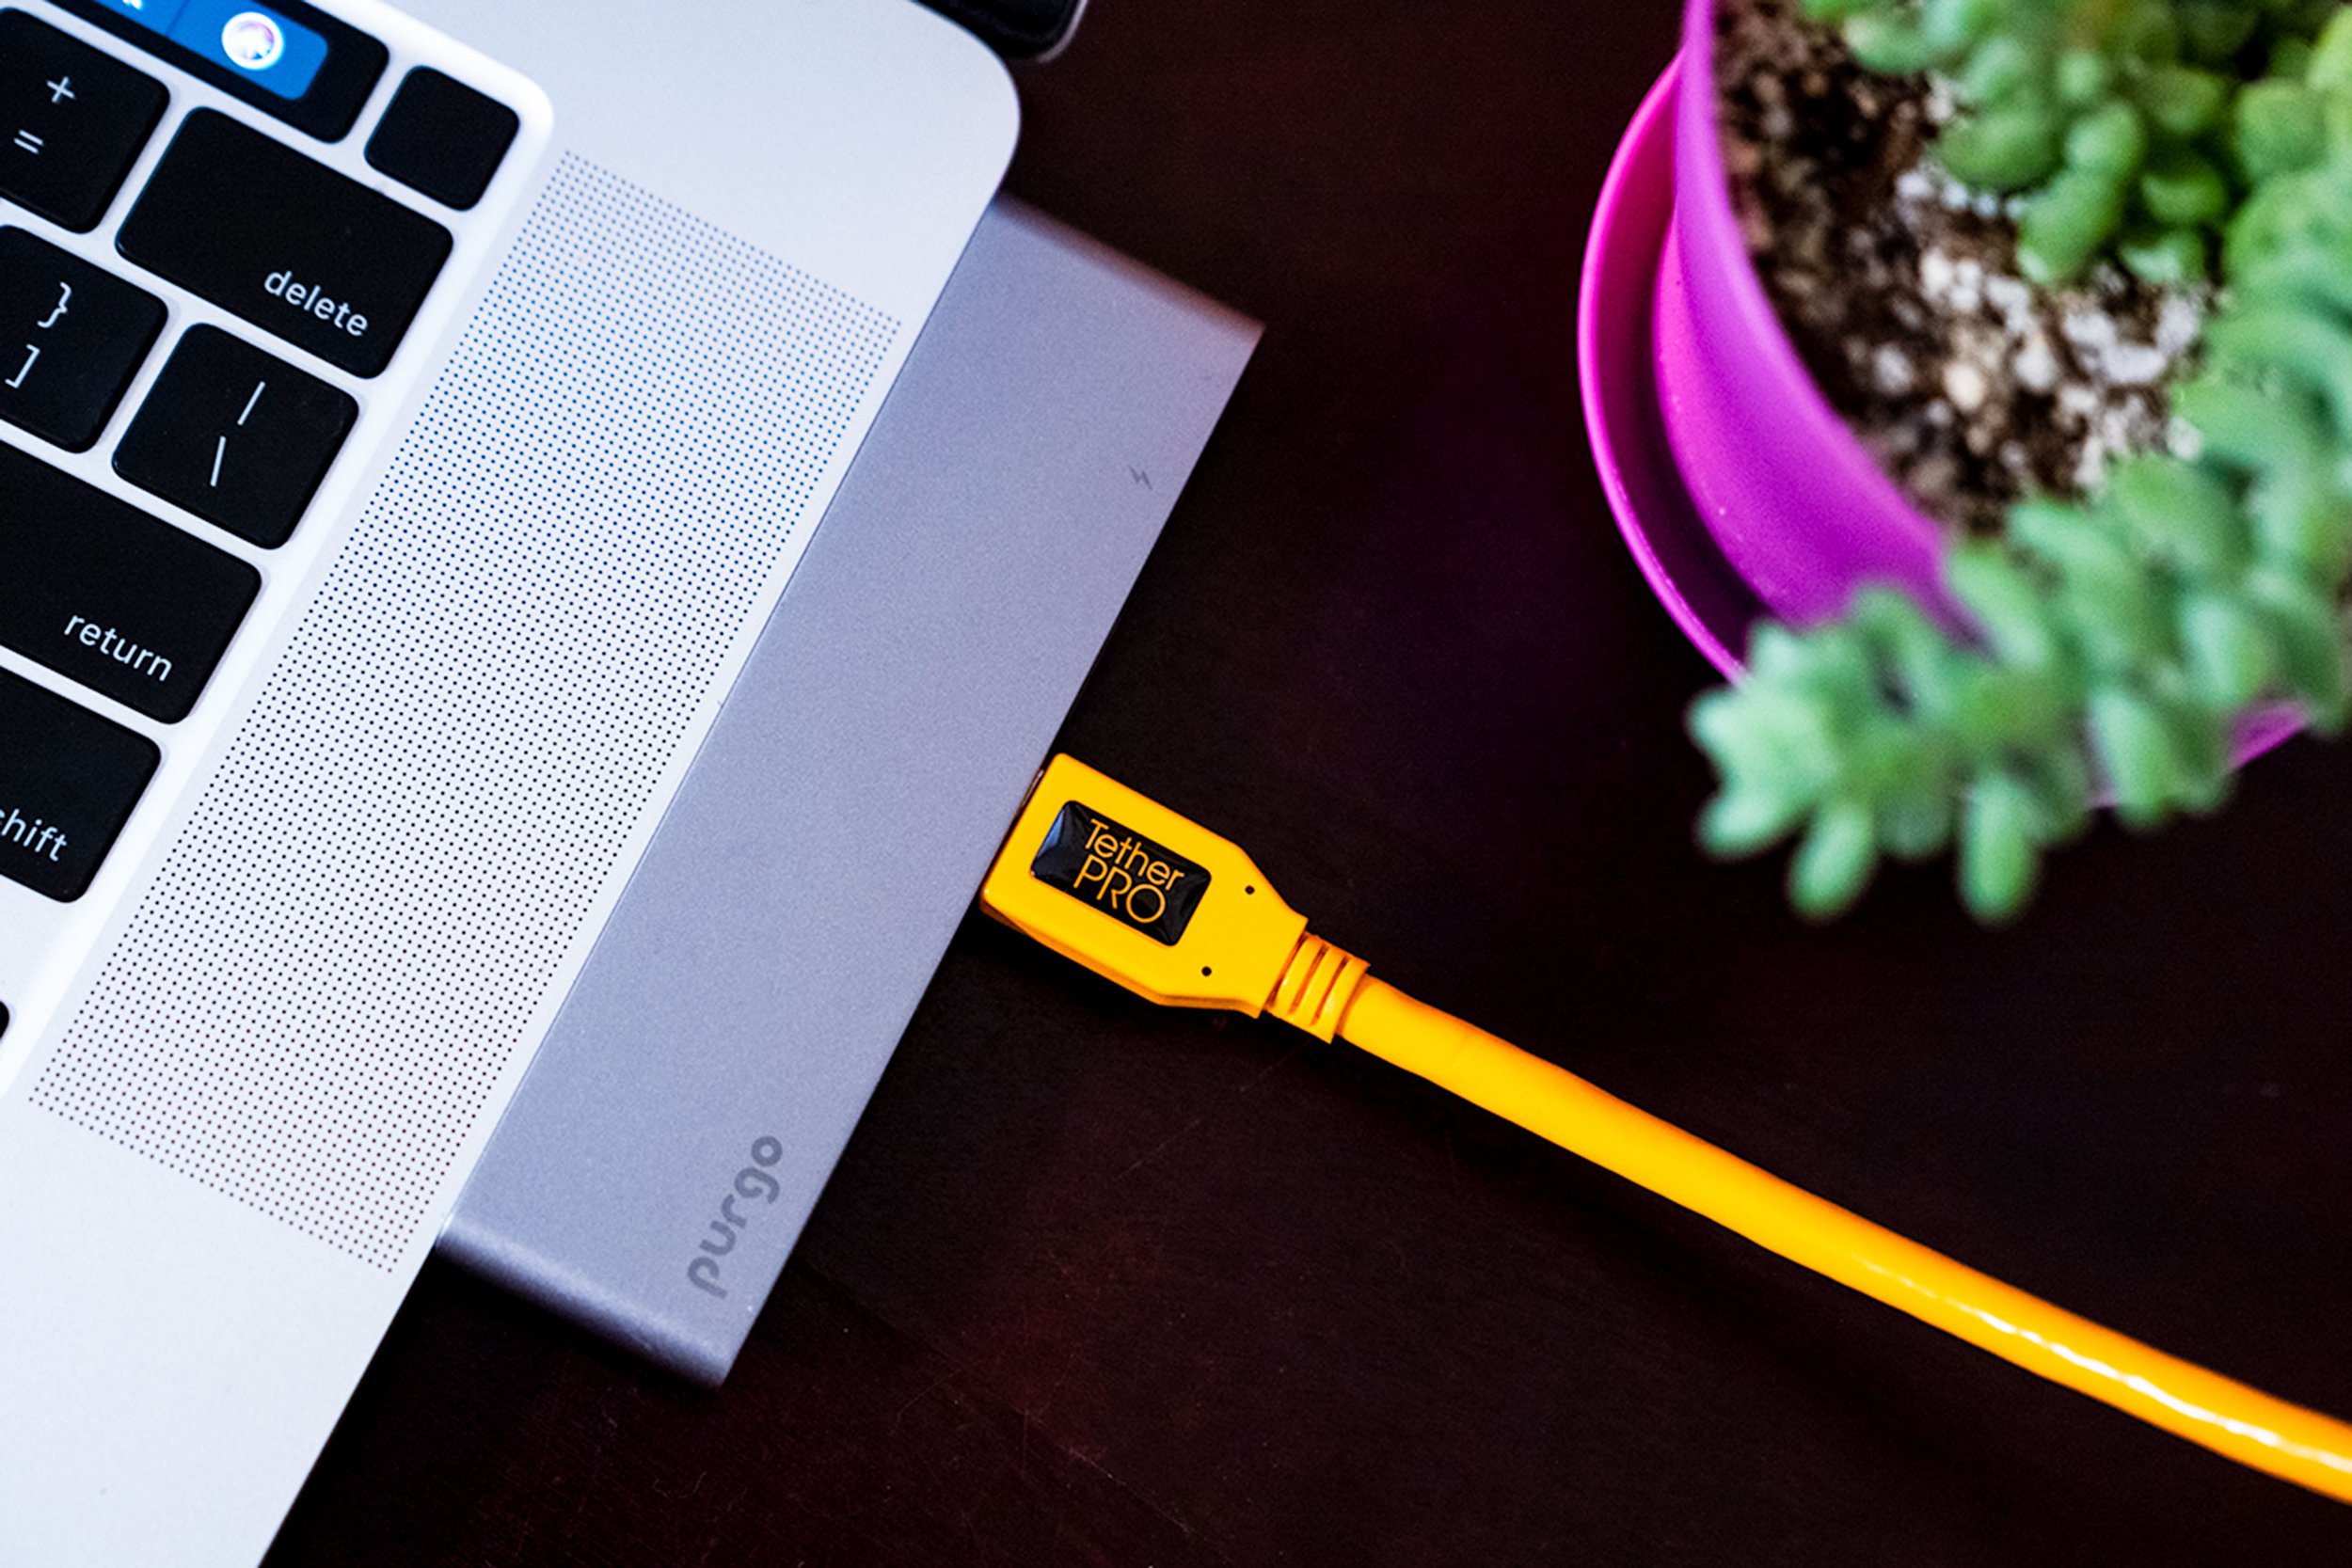
Tethering cable- I use a TetherPro USB 3.0 to USB-C by Tether Tools
Make sure to double check that your cable is compatible with the ports on your computer and your camera model before purchasing!
Adobe Lightroom Classic
Computer (Sony Imaging Edge is Mac/Windows compatible)
Some additional helpful tools I recommend considering adding to your camera kit:
TetherGuard Camera Support - Small jerk projector to protect your ports and cables… I use this one!
TetherBlock - Tethering Cable Connection and Port Protector - The ultimate port protector, Strong and reliable so cables stay secured to your camera
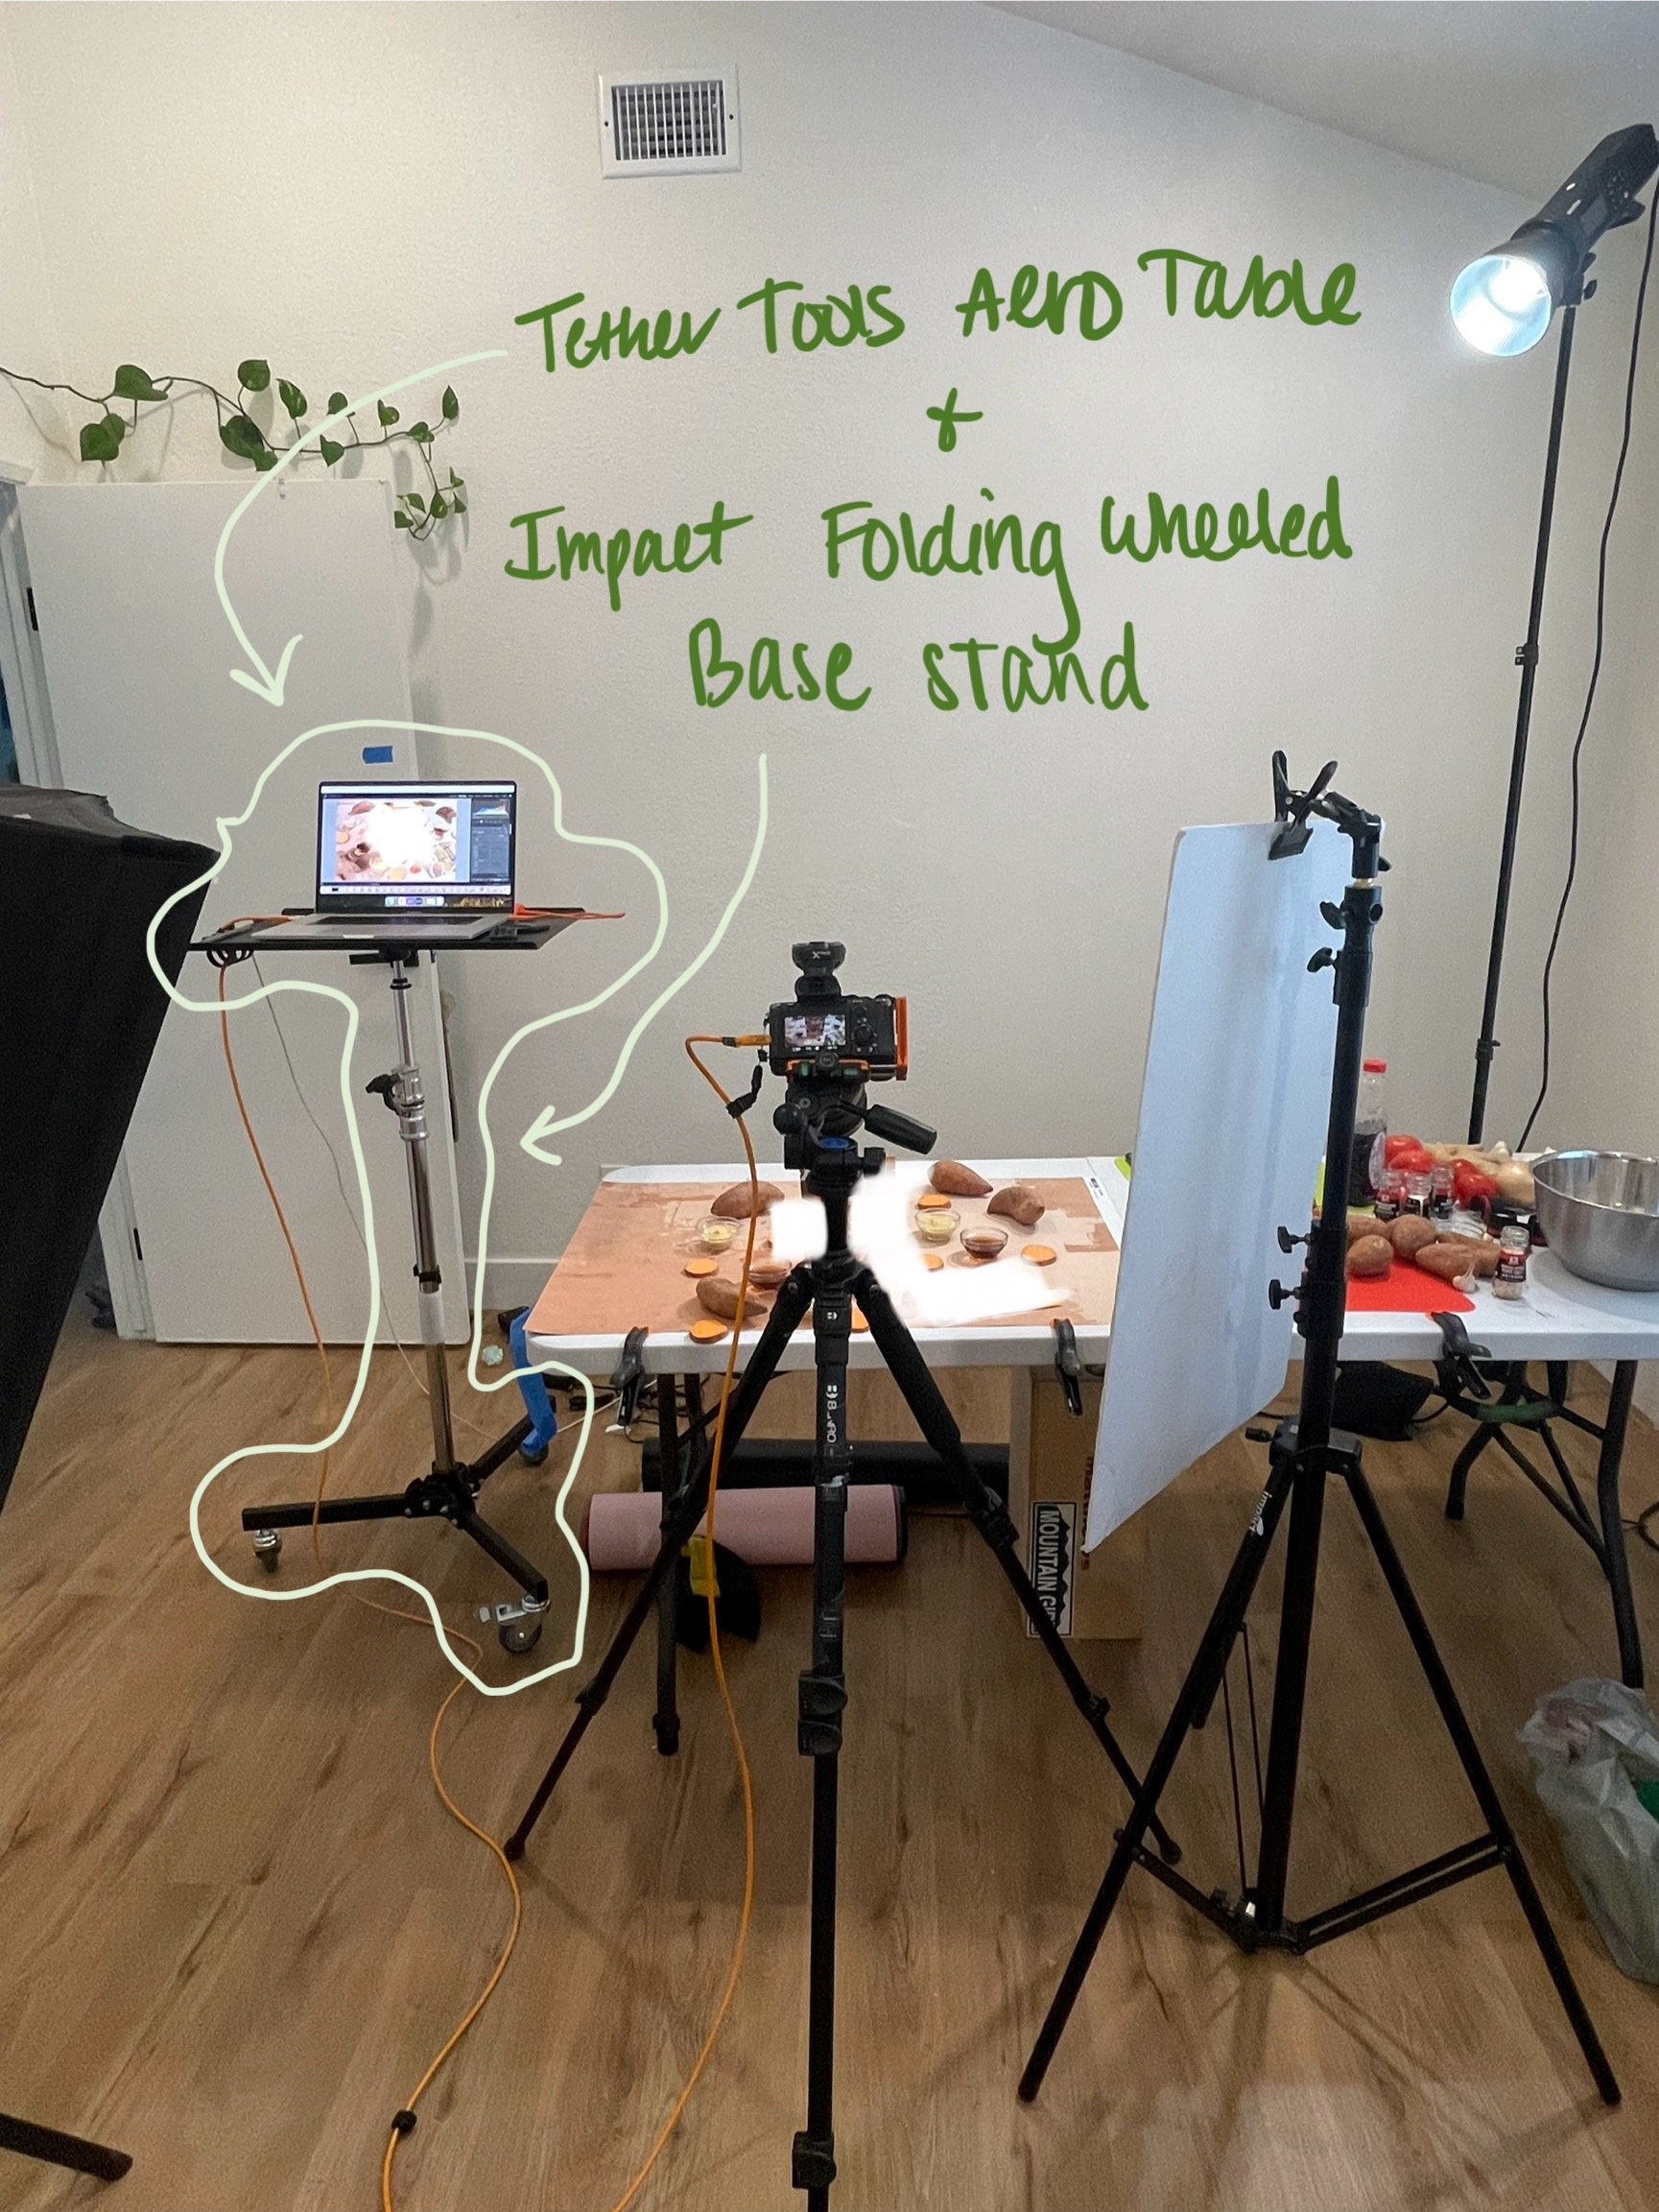
Tether Tools Aero Table, Computer Tethering Platform - Sturdy, reliable, and adaptable platform for your laptop computers, so you can have your computer close to wherever you are shooting
Click here to learn more about what’s in my current tethering setup & see my equipment list.
Alright, let’s get to it!
First things first
To get started, download Sony’s free Imaging Edge Desktop Software to your computer. Click here to go to Sony's page & learn more about the software and click here to download it to your desktop. The Imaging Edge software download comes with three different programs: Remote, Viewer, & Edit. Today we will only be using the Remote application.

Use the Remote Application to tether Sony a7iii.
Change your settings
Second, there is a setting on your camera that will need to be changed. It’s time to grab your Sony a7iii. Go into your Menu screen and toggle to page Setup4 (4/7) and scroll down to USB Connection. Click to open and choose PC Remote.
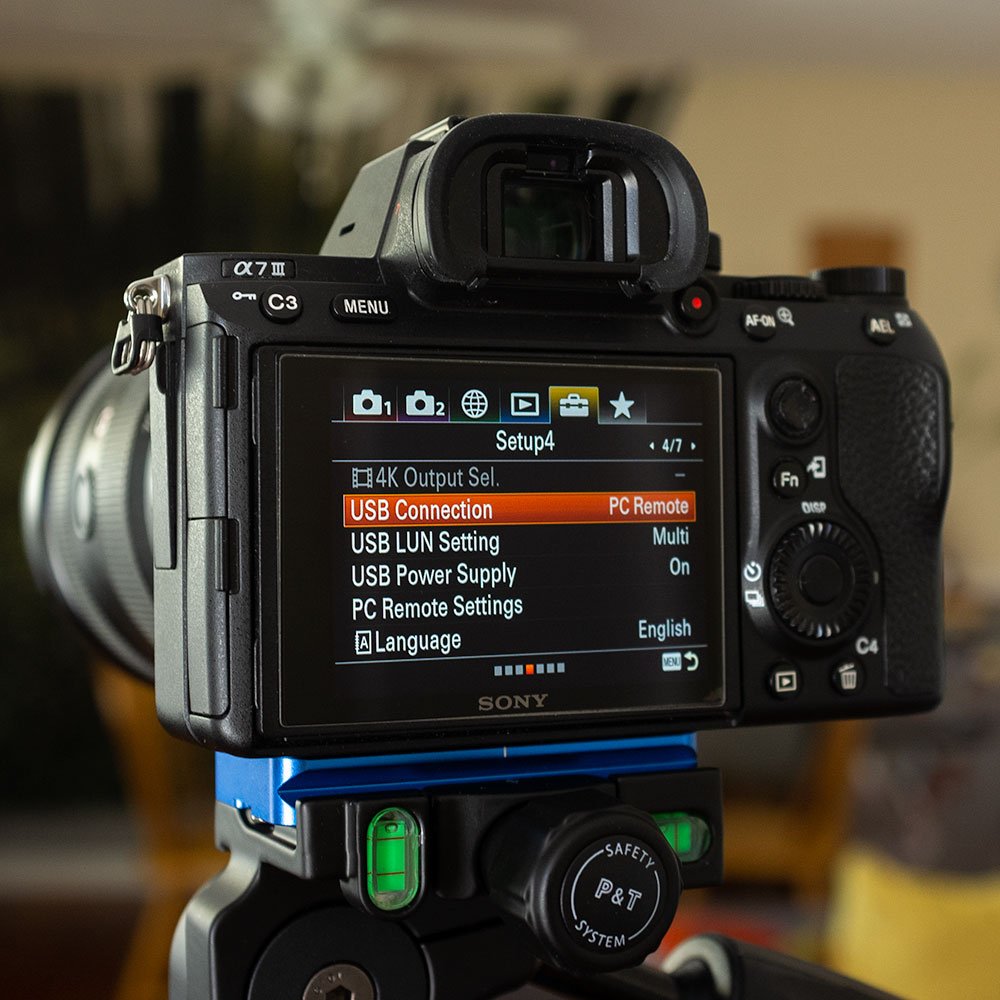
Go into your Menu screen and toggle to page Setup4 (4/7) and scroll down to USB Connection

Click to open and choose PC Remote.
Click to open and choose
PC Remote
.
Close Dropbox & Lightroom... And Google Backup & Scan too! (2021 Update)
Next, hop back on your computer. Make sure to close Dropbox (if you happen to use Dropbox) and close Adobe Lightroom for now. For some reason, the Sony Imaging will not connect with the camera if Dropbox is still open. As of 2021, Google Backup & Google Scan need to be closed too. Also, I've found that my system connects easier when I keep Lightroom closed until after my camera is already connected to the Sony Software.
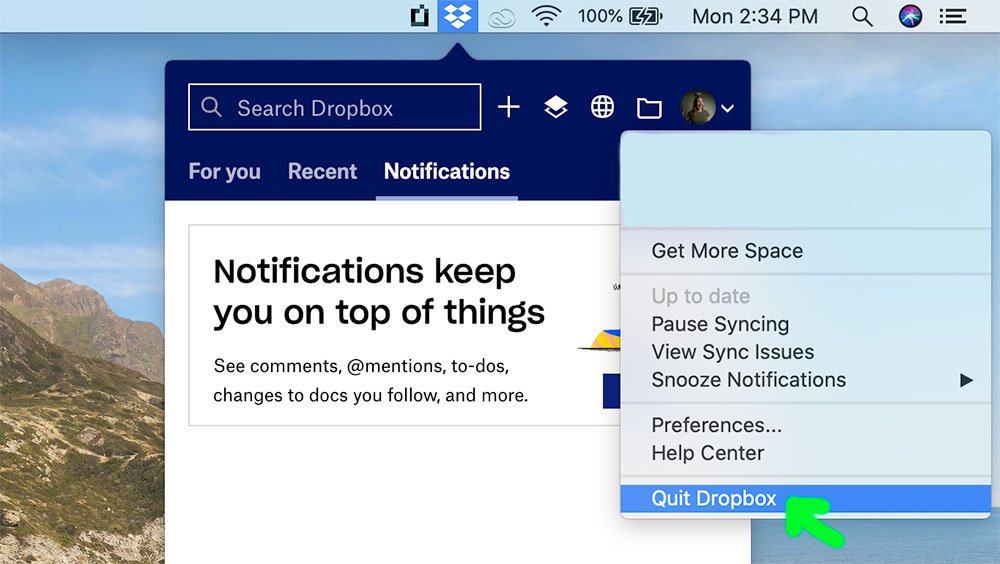
Quit Dropbox before attempting to connect & tether.
Time to plug in and connect!
Open up the Remote App in the Sony Imaging Edge Software on your computer. Grab your tethering cable and plug it into the port on your computer and the port on your camera. Turn your camera on and wait.
As your camera is trying to connect, look for this pop-up window from the Remote software. You may need to hit the refresh button or restart your camera. Your camera name should appear in the window; just double-click your camera to connect.

Click Refresh if you don't see your camera name appear.

Double-click your camera name to connect to it.
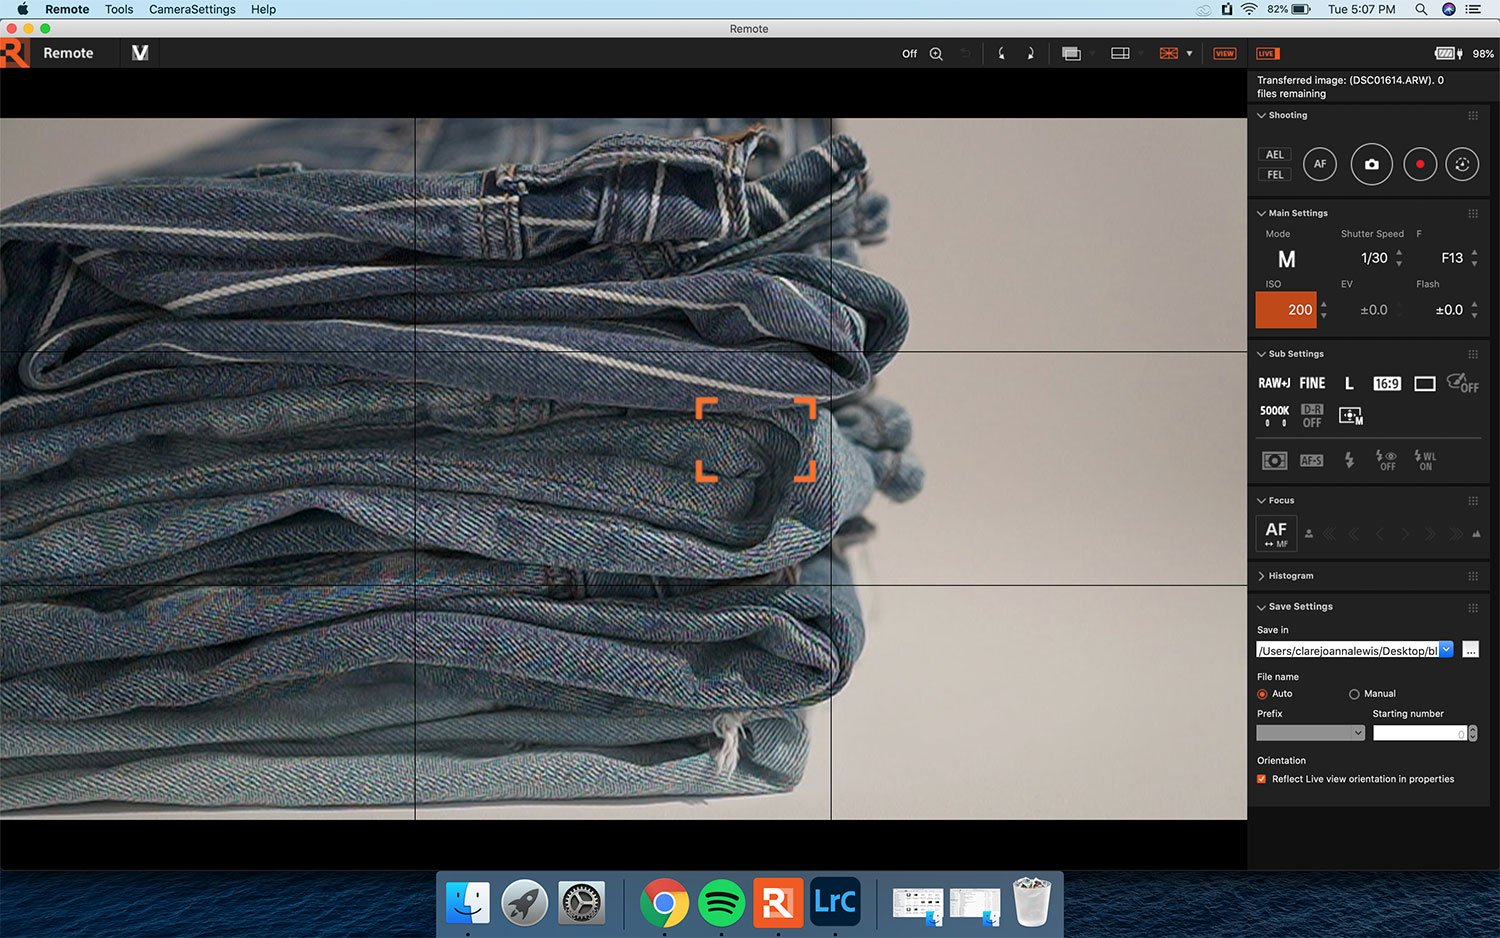
A new window should open and voila! You should see a screen that has a live view of exactly what your lens sees.

Organize your folders
After your camera is connected to the Sony software, the next step is to organize your folders so your images stay organized.
Go to the bottom right of the Remote screen and click the small box to type in your preferred folder destination for your tethered images. Your destination folder name should appear here.

Go to the bottom right of the Remote screen and click the small box to type in your preferred folder destination for your tethered images.
Open Adobe Lightroom
Next, open Adobe Lightroom Classic. Under File, go to Auto Import. Click on Auto Import Settings.
Even though you changed the folder in Sony Remote, you still need to clarify your folder preferences with Lightroom. Make sure to choose the same folder you assigned in Remote so Lightroom knows where to pull the auto imported images from. You’ll also need to decide where you want your final images to go, so remember to make any changes to this folder so your images can stay organized and be saved somewhere specific.

In Lightroom, go to File > Auto Import > Auto Import Settings.
Double check to make sure the Enable Auto Import box is checked so Lightroom knows to start importing your tethered images.

Click the top box to enable auto import. Choose both your Watched Folder and Destination for your images. Change the Subfolder Name if you'd like. Click OK to save.
Start shooting!
You should be all set. Take a few test shots to make sure everything is working right. I’ve noticed that when I shoot tethered using this setup, there is about a 4 to 5 second delay for my images to show up in my Lightroom folder.
Finally, now that your camera is connected, get to know the Sony Remote page so you can use it to your benefit. My favorite part about shooting tethered is that it allows me to use the different grids to help my framing when I’m styling an image. Whether you shoot products, places, or people, tethering is a valuable tool that can help you work more efficiently and really help take your images to the next level.